
Aerial Photography by Radio Control
Since first writing this article in 2000, digicams no longer use serial ports. This means the interface solution adopted would not be applicable today. Nevertheless R/C photography remains an interesting challenge.
Introduction
Aerial photography from R/C models has always held a fascination for me ever since I tried it using a Canon Snappy film camera in the mid 80's. It adds a fascinating dimension to the hobby, and with modern digi-cams running costs are negligible and no need to develop the film.
Controlling the Camera
An obvious way of controlling a digital camera would be to use a servo with a cam pressing on the shutter button, indeed I've seen some great photos taken from a Canon Digital Ixus using this method. However this did not appeal to me as it interferes with the normal use of the camera and in the age of fly by wire it seems a bit agricultural.
Why not do it electronically? It would remove the need for a servo, and could offer superior flexibility (e.g. interval timer functions). However, since no commercial interfaces existed, I would have to build my own.
The solution I chose was based on a commercially available Stamp micro-controller. The interface is described here.
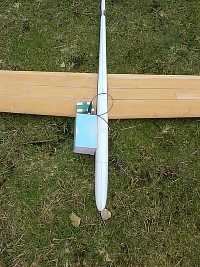
 The photo left shows the layout of the airborne equipment. Note that a non-digital camera is shown here for illustration purposes. My latest interface is about 1/3rd of the size of the one shown.
Flight Tests
My Algebra is a decent size (3 meter), good handling no-nonsense aeroplane, and a perfect choice as a camera platform. A Multiplex mc3030 transmitter was used, controlling ailerons, elevator, spoiler, rudder and the camera.
For flight tests, a cardboard dummy was used in place of the camera, in order to determine the effect of a large bluff object sticking above the wing. Three flights were flown with the dummy mounted in different positions.
 |
 |
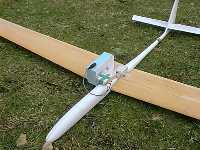 |
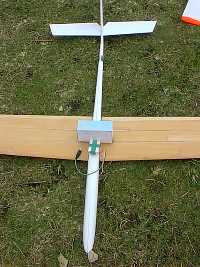
| 1. Camera pointing down. Some reduction in glide but handling safe | 2. Camera pointing back. More drag, reduced stability | 3. Camera pointing sideways. Acceptable handling |
Configuration (2) was very tricky because of the wake over the tail. Therefore, configurations (1) and (3) were used for the operational flights. (In the photos the r/c interface is the small white plastic box with the green tape.)
Results
So what about the results? Not bad at all I think, considering that the C840L is not a brilliant camera. One problem is that the shutter speed cannot be selected, so motion blur is an issue. Even with only about 5% success rate, that still leaves a few decent shots.
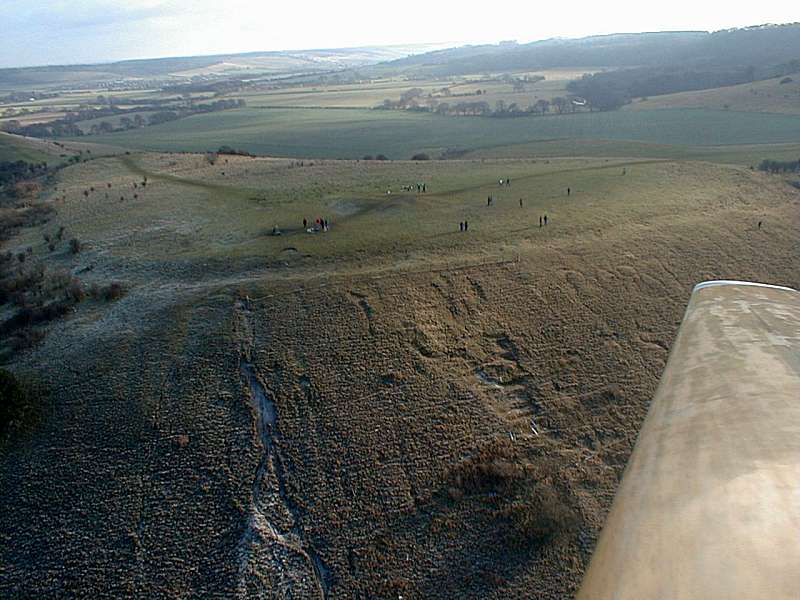
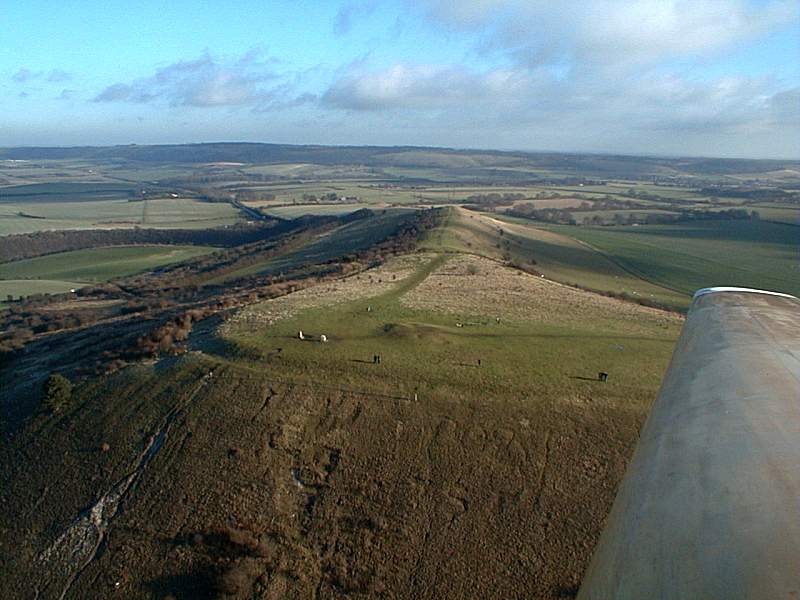
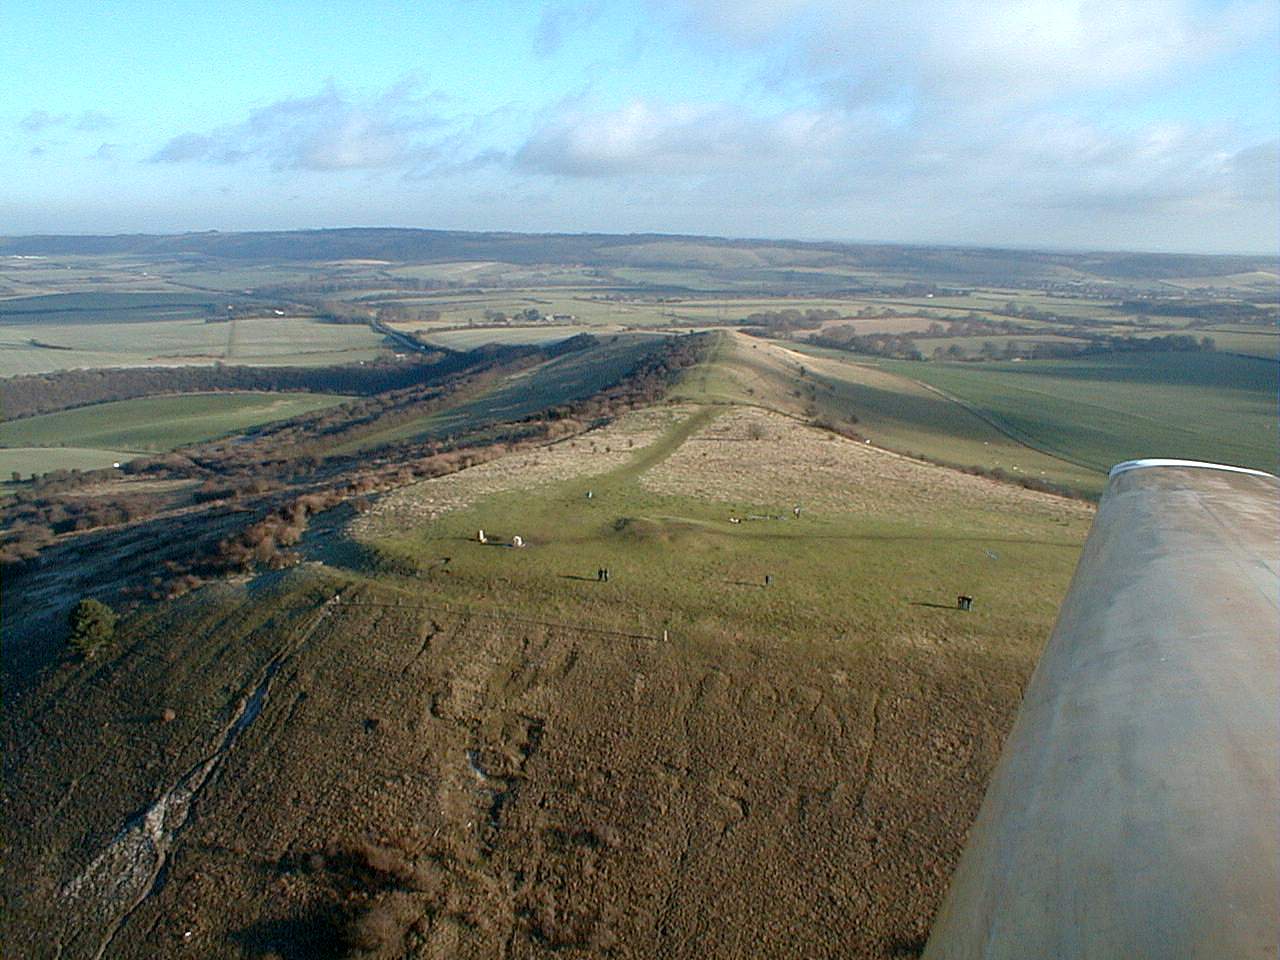
The photos below show Ivinghoe Beacon from the air, using the Algebra.
 |
 |
| Ivingoe Beacon, NW point. 800x600 |
Ivinghoe Beacon 800x600 1280x960 (156KB) |
National Trust
A few photos were sent to the local National Trust office to see if they might be of interest. The NT replied that aerial photographs like this could be very useful for evaluating their scrub management activities. The main problem of course is getting the wind to blow on the bits of the hill they're interested in at the time, so I haven't been able to pursue this unfortunately.
Gyro
Slightly off-topic, I have done some experiments with the Algebra, using an Ikarus Wing Gyro for roll stabilisation. Instead of the digi-cam, I used a Sony Ruvi videocam mounted on top of the wing. The primary objective was to get some good video footage, but the Ruvi also did a grand job of recording effect the gyro was having on the ailerons. I will probably write a separate article on this experiment some time as it was a lot of fun.
What Next
Since writing the original article, virtually all moderm cameras have migrated to USB. The Stamp approach will not work on these. (If anyone has tackled a USB interface than I'd love to know about it!)
Links
- R/C to serial Interface - schematic and code for my R/C to Serial interface.
- Controller for Kodak 3400 by Chad Phillips
- Jon Fick's plans Kodak DC-20 interface. Also aerial photos
- Parallax site for Stamp microcontroller.
- Don Millers page film cam system.
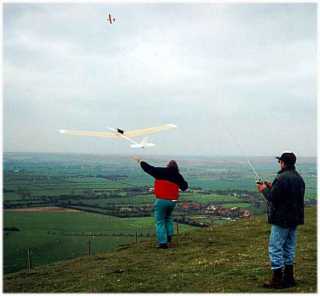 Graham Woods launching camera-equipped Algebra for the author. (Graham Warren photo)