
Making NiMH Battery Packs
Introduction
 Rechargeable NiMH batteries are widely available from high street retailers and on-line merchants. As raw material for battery packs, they offer a number of advantages over ready made battery packs:
- You can tailor the configuration
- Individual cells can be checked for voltage
- Often cheaper
The only slight hurdle is that retail cells are not tagged. Nevertheless, if you're careful with the soldering process, the result is just as good as ready made packs.
Choosing a Brand
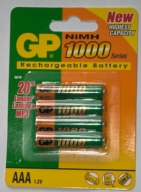
It's worth sticking with the established brands like GP, Sanyo, Kan and Panasonic and try to get an idea of how long the cellls have been lying in stock. Not so important with the new 'hybrid' (e.g. Eneloop) cells, but older chemistry cells deteriorate if left in storage too long.
Check the Voltage
After removing the cells from the packaging, the first thing to do is check the voltage off load, as this will give an indication of their condition. Around 1.1 - 1.2 V per cell is normal. Anything less will indicate a sub-standard cell due to overlong or inappropriate storage. This is less likely with the latest hybrid cells (e..g Eneloops) which have very low self discharge rates.
Less Heat = More Reliability
Since retail cells are untagged, they have to be soldered. It's important to apply as little heat as possible for as short a time as possible when soldering. Paradoxically perhaps, the secret is to use a hefty 25 Watt soldering iron, so the heat from the iron will transfer quickly to the pads. Conventional wisdom says that soldering paste ('flux') should also be used, but I've found that polishing the terminals with 800 wet/dry alone is OK in conjunction with cored lead-based solder. Your mileage may vary.
Construction Sequence
These photos should explain all:
12 March 2007 Nigel Potter writes: "One extra step we eflight boys take is to put a piece of masking tape between the cells, this is because if you short the pack or charge it aggressively it can get hot enough that the heat shrink splits allowing the pack to short itself out."
19th March 2007 Roger Robbins writes "If you crimp up your own connectors, the connectors usually come attached to a thin gold plated strip. These make ideal terminal bridges." |


